

Uncover the secrets of optimal clutch performance with our concise guide to clutch bleeding.
This is one of those things that many drivers probably could do by themselves once they become familiar with the process, but one which many avoid and leave to professional out of fear of getting it wrong.
For anyone who feels like giving it a go though, read on.
From understanding its importance to hands-on DIY steps, we’ve streamlined the clutch bleeding process for you, so let’s delve into the essentials and get your clutch operating at its peak.
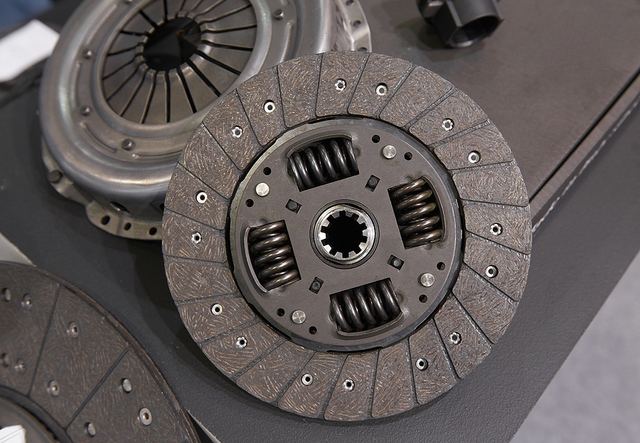
The Importance Of Clutch Bleeding
Bleeding the clutch involves removing air from the hydraulic clutch system by forcing fresh hydraulic fluid through the system, ensuring that only clutch fluid, without any air bubbles, remains.
This process helps maintain a firm and responsive clutch pedal, improves the overall performance of the clutch, and ensures smooth and precise engagement.
Regularly bleeding the clutch is essential for preventing issues such as clutch slippage, difficulty in shifting gears, and premature wear of clutch components, ultimately contributing to the longevity and proper functioning of the vehicle’s clutch system.
Air bubbles in the hydraulic system of a clutch can lead to poor performance by causing a spongy or soft pedal feel.
The presence of air reduces the effectiveness of the hydraulic fluid in transmitting force, resulting in an inconsistent and less responsive clutch pedal.
This can lead to difficulties in engaging and disengaging the clutch, affecting gear shifts and overall drivability.
Bleeding the clutch is essential to remove these air bubbles, ensuring a firm and reliable clutch pedal for optimal performance.
Also Read: How Often Should You Service Your Car?
Signs That Your Clutch Needs Bleeding
Symptoms indicating the need for clutch bleeding include:
- Soft or Spongy Pedal: The clutch pedal feels soft or spongy, lacking the firmness it usually has.
- Difficulty Shifting Gears: Shifting gears becomes challenging, and there may be resistance or grinding during the process.
- Inconsistent Engagement: The clutch engagement point is inconsistent, leading to unpredictable and uneven engagement.
Tools And Materials Needed For Clutch Bleeding
A clutch bleeding kit typically includes essential components such as:
- Brake Fluid: Brake fluid is a hydraulic fluid that fills the clutch master cylinder and slave cylinder, facilitating the transmission of force within the clutch system.
- Clear Tubing: Clear tubing is used to connect the bleeder valve on the slave cylinder to a container. It allows visual inspection of the new clutch fluid flow, making it easier to monitor air bubbles during the bleeding process.
- One-Way Check Valve: A one-way check valve is a device that allows fluid to flow in one direction only. It is often attached to the end of the bleeder hose and prevents air from re-entering the clutch system during the bleeding process.
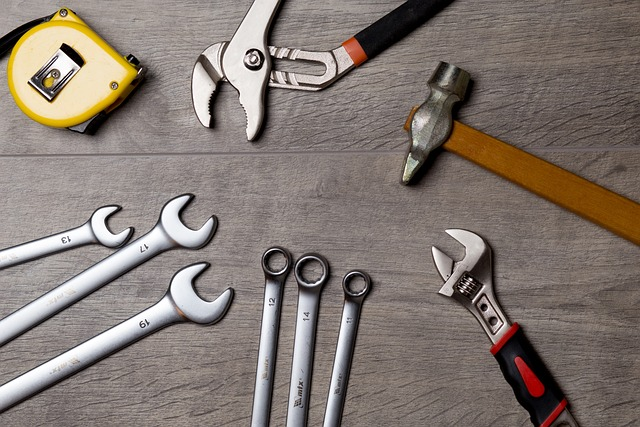
Common household items for DIY clutch bleeding include:
- Brake Fluid: Brake fluid is a crucial component for replenishing the hydraulic system during the bleeding process.
- Clear Plastic Tubing: Transparent tubing serves as a conduit to connect the bleeder valve to a container, allowing visual inspection of the fluid flow.
- Container or Bottle: A container or plastic bottle is used to collect the expelled brake fluid during the bleeding process.
- Wrench or Spanner: A wrench or spanner is necessary for loosening and tightening the bleeder valve on the slave cylinder.
Step-by-Step Guide To Bleeding A Clutch
Locating The Clutch Slave Cylinder And Bleeder Valve
The main components involved in clutch bleeding are:
- Clutch Master Cylinder: Contains hydraulic fluid and serves as the initial point for bleeding.
- Clear Plastic Tubing: Connects the bleeder valve to a container, allowing observation of fluid flow.
- Bleeder Valve: Located on the slave cylinder, it is opened to release air and old fluid during bleeding.
- Container: Collects the expelled brake fluid during the bleeding process.
- Wrench or Spanner: Used for loosening and tightening the bleeder valve.
- One-Way Check Valve (optional): Enhances the bleeding process by preventing air re-entry (optional but useful).
Also Read: 10 Best Used Cars To Buy For 2024
The clutch slave cylinder plays a crucial role in the hydraulic operation of a clutch system. It is responsible for transmitting hydraulic pressure to engage and disengage the clutch mechanism.
The slave cylinder is typically located on or near the transmission, adjacent to the clutch release mechanism.
The bleeder valve is located on the clutch slave cylinder. It serves as the point of access for releasing air and old hydraulic fluid from the system during the bleeding process.
Properly bleeding the clutch system ensures the removal of air bubbles, maintaining optimal hydraulic pressure for smooth and efficient clutch operation.
Preparing The Vehicle for Clutch Bleeding
Begin by lifting the vehicle using appropriate equipment such as a hydraulic jack or car ramps, ensuring stability and adherence to safety guidelines.
Once elevated, securely support the vehicle with jack stands to prevent accidental lowering. It’s crucial to choose a level surface and engage the parking brake to enhance stability during the process. Additionally, chock the wheels opposite the side being lifted to prevent any unwanted movement.
This preparation not only ensures the safety of the person performing the clutch bleeding but also facilitates easy access to the clutch master cylinder and slave cylinder, streamlining the overall bleeding procedure.
Opening The Clutch Bleeder Valve And Attaching The Tubing
When using a wrench to open the bleeder valve follow these steps:
- Identify the bleeder valve location on the clutch slave cylinder.
- Select an appropriately sized wrench for the bleeder valve.
- Place the wrench securely onto the bleeder valve.
- Turn the wrench counter-clockwise to open the bleeder valve.
- Use caution to avoid over-tightening or damaging the valve.
- Allow the hydraulic fluid to flow, releasing air and old fluid from the system.
- Close the bleeder valve by turning the wrench clockwise.
- Ensure the valve is securely tightened to prevent leaks.
Pumping The Clutch Pedal And Monitoring Brake Fluid Levels

When pumping the clutch pedal to expel air from the system, follow these instructions:
- Depress the clutch pedal slowly and steadily, then release it. Repeat this process multiple times to build up hydraulic pressure in the clutch system.
- Maintain a consistent rhythm while pumping the pedal to facilitate the expulsion of air bubbles from the hydraulic system.
- Ensure that the clutch pedal is pushed to its full extent with each depression to maximize the effectiveness of air expulsion.
Also Read: How Long Do Car Tyres Last?
Remember to monitor brake fluid levels as this will stop air getting back in.
To prevent the reintroduction of air into the system:
- Monitor the brake fluid reservoir during the bleeding process.
- Keep an eye on the fluid level, ensuring it remains above the minimum mark.
- If the fluid level drops, top up the reservoir with the appropriate brake fluid to prevent air from entering the system.
Closing The Bleeder Valve And Testing Clutch Operation
After completing the clutch bleeding process, it is crucial to properly close the bleeder valve to prevent air or fluid leaks.
Using a wrench, carefully tighten the bleeder valve to the manufacturer’s specifications, ensuring a secure and airtight seal. This step is essential in maintaining the integrity of the hydraulic system.
Following the closure of the bleeder valve, test the clutch pedal for improved firmness and responsiveness.
Depress the pedal to ensure smooth engagement and disengagement of the clutch.
A firm and responsive pedal is indicative of a well-bled hydraulic system, free from air pockets that could compromise performance.
This final check ensures that the clutch operates optimally, providing a seamless driving experience.
Tips And Troubleshooting Clutch Bleeding

- Gather the necessary tools and materials, including a clutch bleeding kit.
- Ensure the vehicle is on a level surface and securely lifted for accessibility.
- Use the appropriate wrench to open the bleeder valve.
- Attach clear tubing to the bleeder valve and submerge the other end in brake fluid.
- Pump the clutch pedal to expel air from the system, monitoring the brake fluid reservoir.
- Close the bleeder valve tightly to prevent air or fluid leaks.
- Test the clutch pedal for improved firmness and responsiveness.
- Dispose of used brake fluid properly and follow safety precautions throughout the process.
Common challenges and pitfalls during clutch bleeding include:
- Air reintroduction
- Fluid contamination
- Bleeder valve leaks
- Inadequate fluid levels
- Incorrect bleeding sequence
- Overlooking worn components
- Inconsistent pedal feel
Also Read: How Long Does A Car Service Take
Troubleshooting Air Bubbles And Incomplete Bleeding
Signs of incomplete bleeding and potential causes might include:
- Soft or spongy pedal: Air still present in the system, insufficient fluid pressure, or potential leaks.
- Inconsistent engagement: Residual air pockets, inadequate fluid flow, or improper bleeding sequence.
- Difficulty shifting gears: Remaining air bubbles affecting clutch disengagement and engagement.
If these issues still apply, then follow these steps for revisiting the bleeding process:
- Recheck the bleeder valve
- Repeat the bleeding procedure
- Check for leaks
- Verify fluid levels
- Confirm proper pedal feel
Precautions And Safety Measures
Safety precautions should be taken when working with brake fluid:
- Use protective gear
- Work in a well-ventilated area
- Avoid skin contact
- Keep away from open flames
- Protect painted surfaces
- No smoking
You should also follow proper disposal and handling guidelines:
- Use a proper container
- Follow local regulations
- Avoid mixing with other fluids
- Recycle if possible
- Don’t pour down the drain
Part of making sure you are doing things safely is also to know when to seek professional assistance.
Scenarios where professional help may be necessary include:
- Persistent issues
- Complex system problems
- Lack of improvement
- Limited expertise
- Lack of specialized tools
- Safety concerns